Newbie about cretion of custom (personal) track without loop

All discussions on existing and 'to be done' Track Sets
User avatar
escottc
20 or more Posts ★★★
Posts: 34
Joined: Fri Mar 29, 2013 1:27 pm

Newbie about cretion of custom (personal) track without loop

Post by escottc »

Hello everybody!,

I'm hoping to create a track, so to speak, that is not a loop. Basically a track that goes from point A to B, but not a loop. Purpose: Create a track that is part of my commute to and from work (I promise to drive safely). I was at one point able to see a map to set POIs, but wasn't sure if I should use "Stop/Go" or one of the other settings.

Ideally I'd hope that I could enter Lat/Long manually, but haven't seen how this might be done, well, other than the one time I was able to see Google Map area.

Sorry if this is not enough information, but please understand some terminology is new to me as I'm obviously a novice user.

Could someone please direct me to a link so I might be able to understand things better? I look forward to using the App, but mostly look forward to Summit Point, WV for use :arrow: .
User avatar
Harry
Site Admin
Site Admin
Posts: 10518
Joined: Sun Sep 12, 2010 10:32 am
Location: Siegum, Germany
Contact:

Re: Newbie about cretion of custom (personal) track without

Post by Harry »

Image Image Image Image
User avatar
escottc
20 or more Posts ★★★
Posts: 34
Joined: Fri Mar 29, 2013 1:27 pm

Re: Newbie about cretion of custom (personal) track without

Post by escottc »

Thanks man. Have a great weekend.
rscliofan
20 or more Posts ★★★
Posts: 152
Joined: Tue Jun 12, 2012 12:48 pm

Re: Newbie about cretion of custom (personal) track without

Post by rscliofan »

I did this for some friends to help explain a step by step walk through, although its a circuit it may give you a better idea of how to do it. Hope it helps

How to create a basic poi set (track)

In this example we will set up a track round the block with a stop/go trigger (finish line that starts & stops timing/video automatically), 4 corners and 2 splits (sectors)

Ok click more tab then map, you will see a small cross hairs bottom right, tap it to stop centre map location allowing you to move the map round without it springing back to your current location.
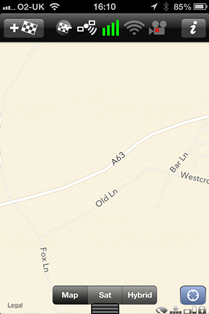


Image


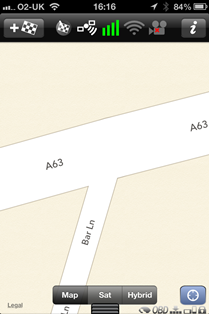
Now go to where you wish to place the stop go trigger and zoom in on that location
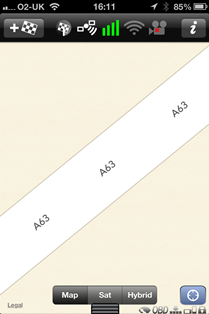

Image


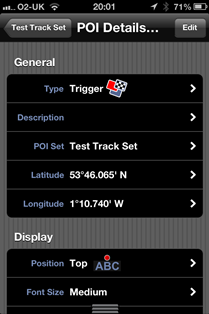
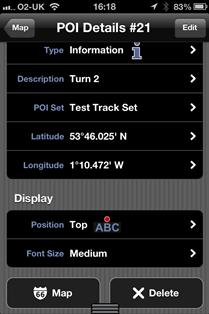
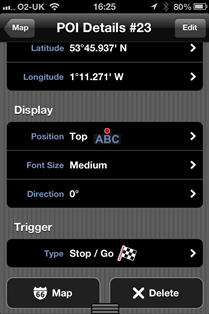
tapping the flag top right will bring up the following page. ***Noting*** the type set to trigger.
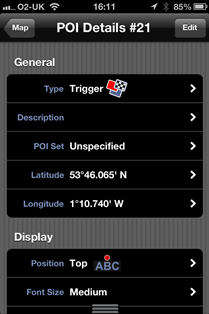

Image


Tap the edit top right and then add new track
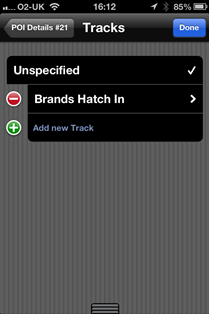

Image


type the track description, in this example i've named it Track Test Set
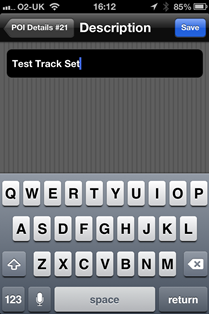

Image


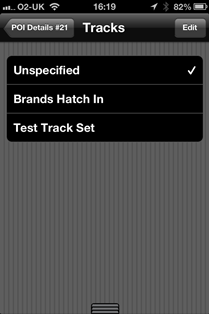
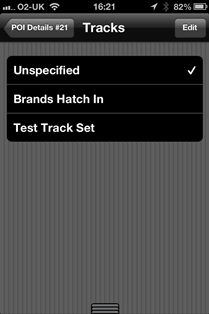
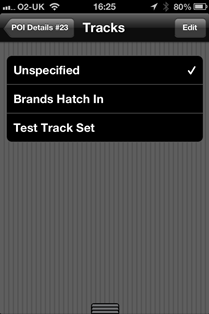
now hit poi set that will be set as unspecified at this point


Image


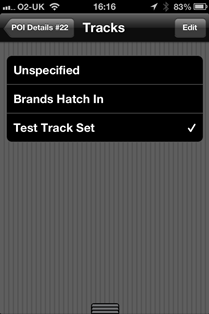
and hit the track set name you wish to associate the current poi to, in this case test track set
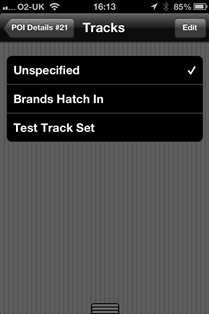

Image


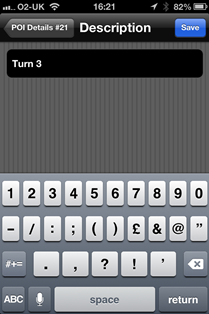
Now press description


Image


and describe it in this case as Stop Go and save (top right)
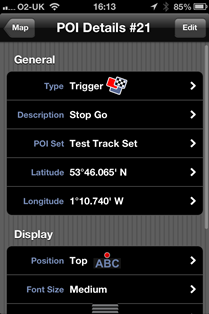

Image


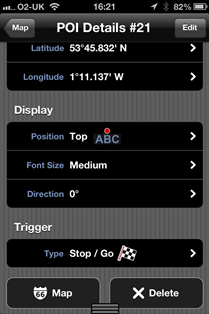
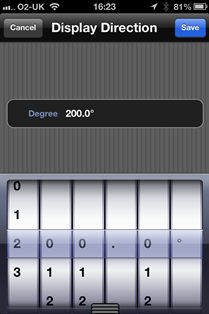
scroll down and hit direction


Image


you need to now add the direction of travel in degrees, in this case 55o and save
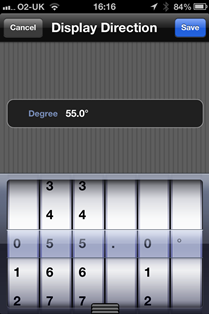

Image


now click map at the bottom to see the current poi and note the direction now lines up with the road
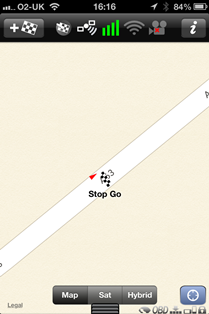

Image


we now need to move to our next poi on the map, in this case it will be a right turn
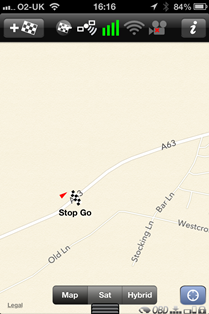

Image


and zoom in to set the poi


Image


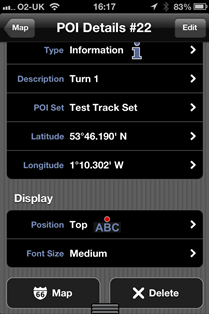
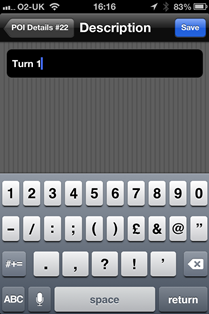
top the flag as before top left to place it and name it in this case Turn 1 and then save

Image


associate it with the track set


Image


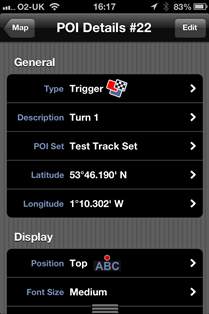
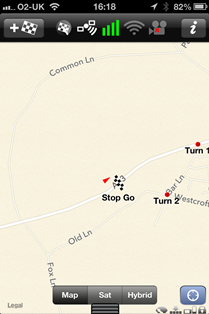
so it will now look like this


Image


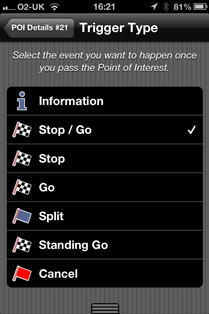
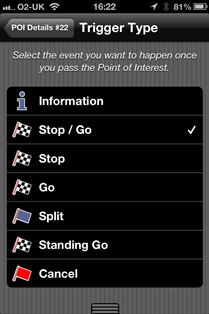
go to the trigger type (currently set to stop go) and tap it
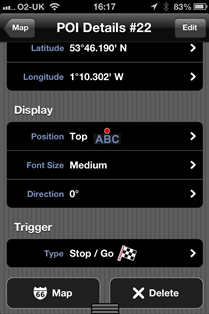

Image


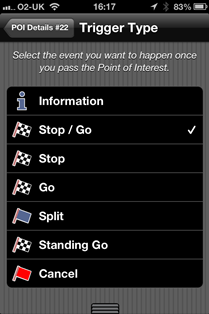
and change it by tapping it to information with it being a corner

Image


it will now alter to look like this


Image


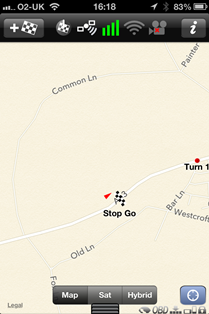
going to map we can now see the first two poi's

Image


now scroll to the next poi placement and zoom in again and hitting the flag again to set the poi placement
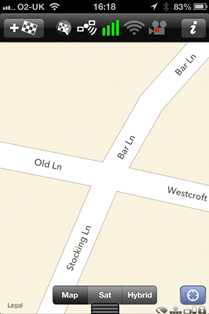

Image


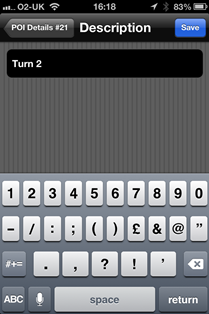
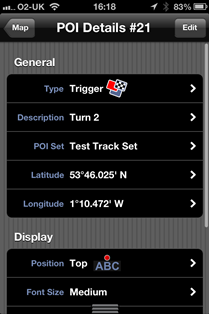
name it and save


Image


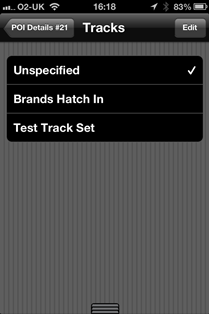
associate it with the track set


Image


Image


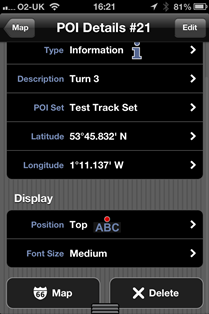
scroll down to change the trigger type
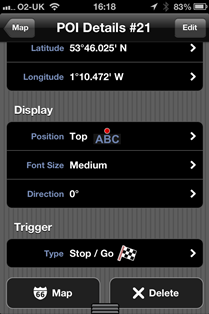

Image


and set it as info


Image


click map


Image


and scroll and zoom for the next poi and hit the flag to set its placement
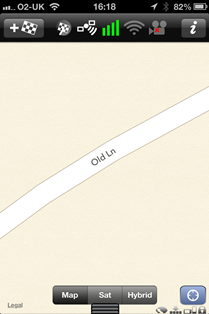

Image


This time we will set a split up and name it accordingly
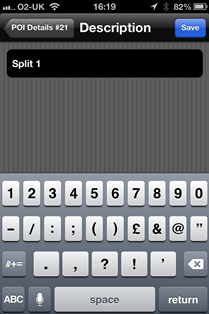

Image


associate it with the poi set


Image


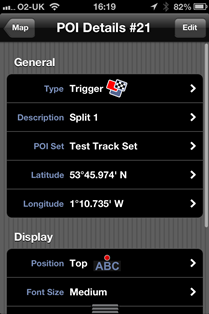
scroll down and hit the trigger type


Image


This time set it as a split


Image


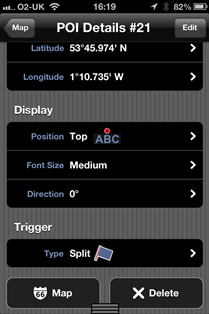
as you will see we need to set direction again

Image


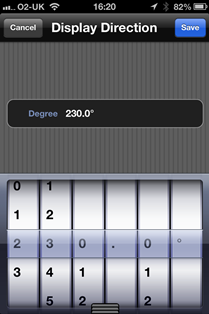
so as before we need to set it and save

Image


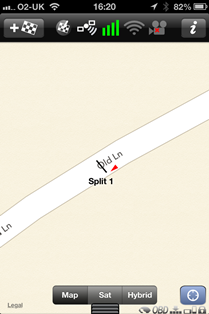
and the map will sow it lined up with the direction of travel

Image


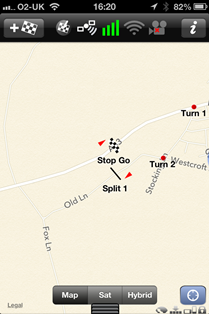
now clicking map as before we can see the track coming on nicely

Image


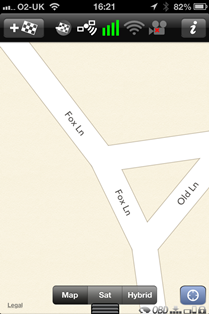
so time to scroll and zoom to the next poi (corner 3 this time) hitting the flag to set it

Image


name it


Image


add the track set


Image


press the trigger


Image


set it to information


Image


click map


Image


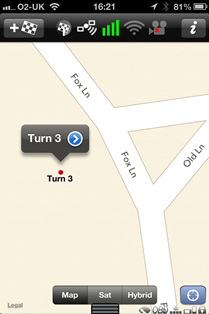
now you will see its not quite lined up, this can happen from time to time. so tap the poi and you will see its info + a blue arrow

Image


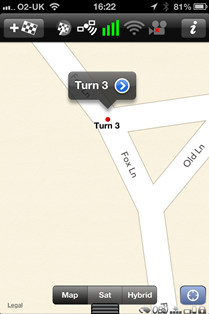
holding your finger on it you can now drag and drop it into place

Image


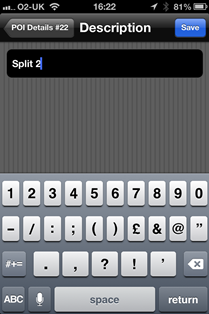
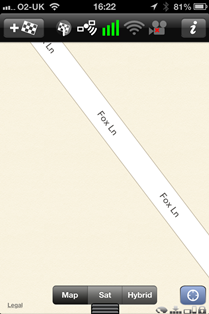
So then scroll to the next poi place and zoom accordingly and we will make a split 2 buy hitting the flag

Image


name and save it


Image


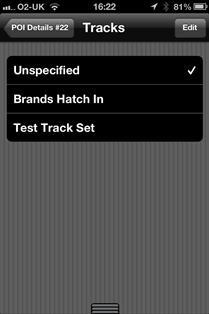
associate it with the poi set


Image


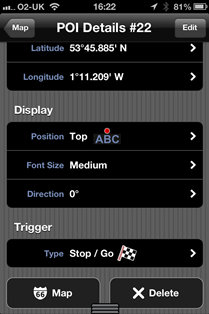
change the trigger type


Image


set it as split again


Image


set and save direction


Image


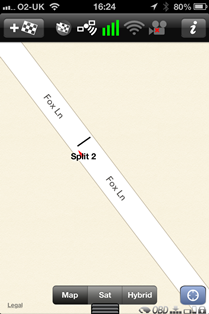
now as you can see its not quite right
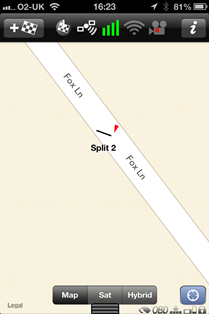

Image


tap the split and click the blue arrow
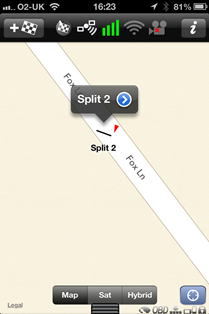

Image


it will then take you to the main page and go back and change the direction and save
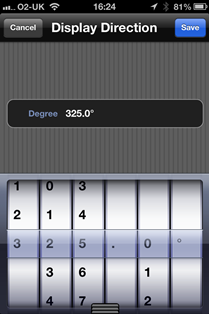

Image


back to the map to check alignment


Image


now onto the next poi placement and zoom in hitting the flag again to set its position
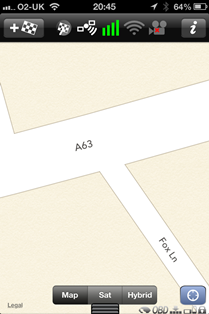

Image


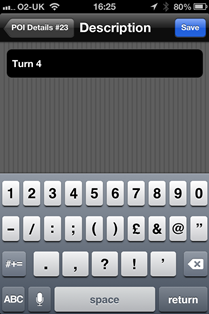
this time adding turn 4 and save it


Image


setting the track set


Image


trigger type to information


Image


so now go to the map and we can see the full circuit
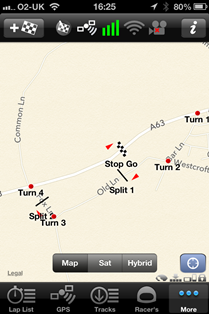

Image


if you then go the the lap list tab you will see the poi set named test track set with the 7 poi's (4 corners, 2 splits and the stop go trigger)
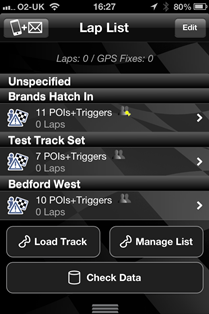

Image


and hitting the track set you will see all the poi's, don't worry they are not in the correct order as they work on long/lat positions
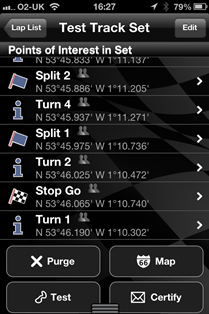

Image


now all you have to do is go out and drive the circuit with it set to time/video.
User avatar
escottc
20 or more Posts ★★★
Posts: 34
Joined: Fri Mar 29, 2013 1:27 pm

Re: Newbie about cretion of custom (personal) track without

Post by escottc »

Wow, what a great community, thanks all. And thank you rscliofan for going through the steps, and taking the time to set all that up. Kudos!
rscliofan
20 or more Posts ★★★
Posts: 152
Joined: Tue Jun 12, 2012 12:48 pm

Re: Newbie about cretion of custom (personal) track without

Post by rscliofan »

Welcome, it's just a basic intro to get you started but I'm glad you have found it useful.
hms
20 or more Posts ★★★
Posts: 172
Joined: Fri Aug 12, 2011 11:40 am

Re: Newbie about cretion of custom (personal) track without

Post by hms »

RSCliofan,
nice piece of work.
Placement of splits may be worth talking about.
My track toy is a knackered old 1.6 athsmatic MX5, no speed on straights but can worry and Elise on corners. Therefore how I attack corners is key for a fast time. I therefore tend to place splits on the approach to and shortly after the exit of a corner. That allows me to compare time through corners. Plus a long straight between corners will show if the line through the corner was good by a higher speed at the next split. It is especially important on the corner leading onto the longest straight.
What process do others use for split placement?
h
Black S Special goes by the name of Lexie.
JRSC M45, 189.6 bhp JR ARB's, TDR belt tensioner, Steve Heath Rose jointed drop links, Absolutely Shocks GAZ springs and dampers, Alignment by WIM

Image
User avatar
Harry
Site Admin
Site Admin
Posts: 10518
Joined: Sun Sep 12, 2010 10:32 am
Location: Siegum, Germany
Contact:

Re: Newbie about cretion of custom (personal) track without

Post by Harry »

For me, sector times are more on benchmarking than on improving individual corners.

Optimizing corners can be done much better using the graphs and gap calculations in LapTimer's Data Recordings. A further, very good indicator for the advantage a certain line in corners has, is to watch the max speed achieved on the straight just behind that corner - the faster, the better, especially for underpowered cars.

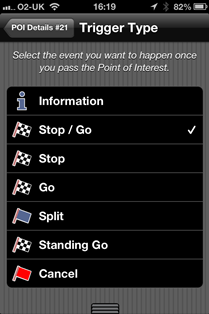
Back on split positions: as I prefer to use them for rough benchmarks, it is important to place them somewhere they can be compared without depending on the line driven - i.e. on straights. Usually, I set them on this straights far down the road, but clearly ahead of the braking point. This by the way is the best approach for high recording accuracy too.
Just my 5 cents, I more an expert on programming than on driving ;-)

- Harry
Image Image Image Image
rscliofan
20 or more Posts ★★★
Posts: 152
Joined: Tue Jun 12, 2012 12:48 pm

Re: Newbie about cretion of custom (personal) track without

Post by rscliofan »

The above demo was simply a basic guide to show how to create a poi set.

Easiest way to gain time is get professional tuition. EVERY time I go out on track I book some.

And that is regardless of how familiar I am with the track. They will always find time by improving and reminding me of what I am doing right and wrong as well as teaching advance techniques.
User avatar
Harry
Site Admin
Site Admin
Posts: 10518
Joined: Sun Sep 12, 2010 10:32 am
Location: Siegum, Germany
Contact:

Re: Newbie about cretion of custom (personal) track without

Post by Harry »

Yes, for sure, but off topic ;-)
Image Image Image Image
Post Reply